New User
To create a new user, select the  button which will lead to the following
screen:
button which will lead to the following
screen:

Figure 2: New User
This screen is comprised of four (4) sections:
o Employer Information;
o Personal Information;
o Roles; and
o Custom Authorizations (upon selecting this section it details the features available to enable for a new user).
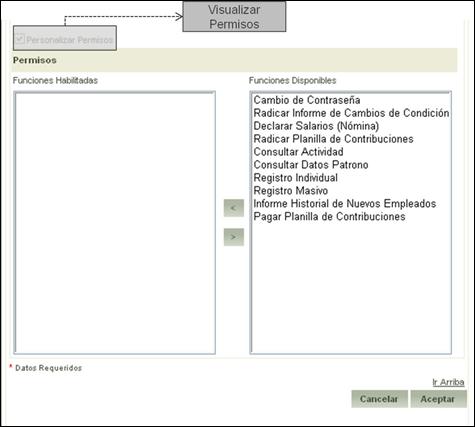
Figure 3: Custom Authorizations
Steps to follow:
1. Complete all required fields (identified by an *).
2. Select the role to be assigned to the user.
3.
Select the  button to assign the
role.
button to assign the
role.
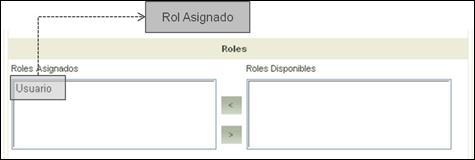
Figure 4: Assign Role
Note: The roles selected transfer over to the selected roles list (as made evident in the previous figure).
4.
Select the Accept  button to register
the data entered into the system.
button to register
the data entered into the system.
The application will confirm the new user registration by way of a message displayed on the Clients Management main page indicating that the user (name) was created.
The system then sends a message to the new users e-mail address with the necessary credentials for access to the Portal.

Figure 5: Message to the Administrator Confirming the Creation of a New User