File Status Change Report
The File Status Change Report feature allows the employer to modify their current status before the Department of Labor and Human Resources.
|
DTRH User Only
|
If it is a Department of Labor and Human Resources user, the Represent Employer screen will appear before accessing the File Status Change Report. Please refer to the Represent Employer section for additional information. |
The following changes can be made:
• Name Change
• Change of Address
• Change of Ownership
• Cessation of Operations
• Business Withholding
• Control of Other Businesses
• Incorporation
To file the report the user must complete five (5) mandatory steps.

Figure 6: Steps to File a Status Change Report
The first three (3) steps pertain to the PRSD-4 form.
The Remittance Confirmation displays the completed form with the information entered so as to facilitate verification of the information to be registered.
The final step presents a confirmation of the filed report.
Steps to follow:
1. Enter the credentials required to access the Portal.
2. Select the Employer Information tab. A general description of the service will appear.
3. Select the File Status Change Report option to access the PRSD-4 form and proceed to record the report.

Figure 7: File Status Change Report
4. Complete the fields on the form you wish to register in accordance with the responses selected for each of the questions. For example:
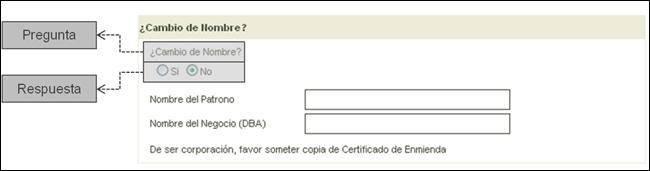
Figure 8: Name Change
The user can determine whether or not the effecting of certain fields is necessary based on their previous responses. If the user responded that there was no Name Change, they should not complete the Employer Name or Company Name fields. However, if the user does complete those fields, the application will indicate that the information entered is invalid.
A series of fields are made available to the user which may or may not be completed, allowing for modification of the report to suit the users needs.
5.
Select the  button to validate the
information entered and continue to load the form.
button to validate the
information entered and continue to load the form.
Note: To reload a blank
form, select the  button.
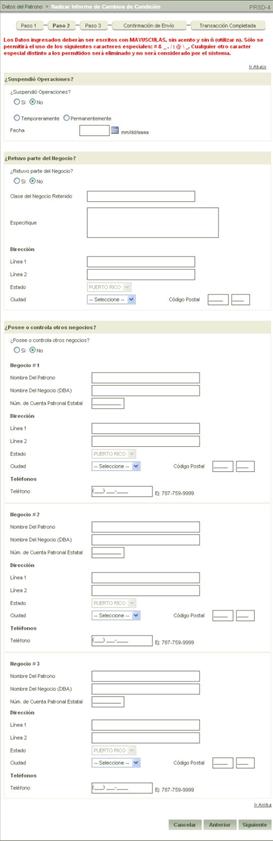
Figure 9: File Status Change Report
6. Similar to the previous step, complete the form in accordance with the responses already selected.
7.
Select the button to continue loading
information onto the form.
Note: To reload a blank
form, select the button.
Note: To modify
information entered during a previous step, select the  button which will direct the user to
Step 1 and display the previously entered information.
button which will direct the user to
Step 1 and display the previously entered information.
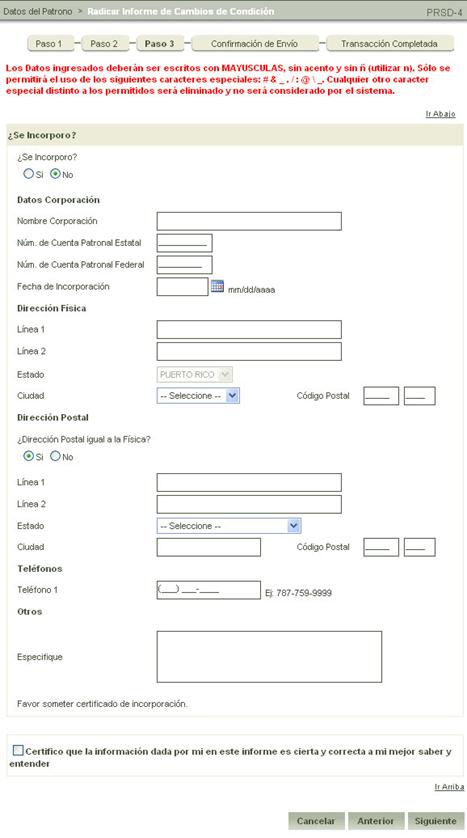
Figure 10: Register Status Change Report
Step 3 is the final stage in which the user will be required to enter information. Similar to the previous steps the user must complete the form in accordance with the responses already selected.
To proceed, select the certification option located at the end of the form. The user will not be able to proceed unless this option is selected.
8.
Select the button to continue loading
information to the form.
Note: To reload a blank
form, select the button
Note: To modify
information entered during a previous step, select the button which will direct the user to
Step 2 and display the previously entered information.
The remittance confirmation of the transaction performed will be displayed.
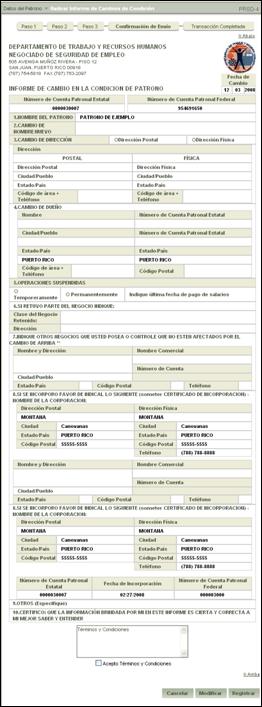
Figure 11: Complete Status Change Report
Verify that the information entered is correct.
1. Carefully read the Terms and Conditions. Upon consenting, select the box located below that section.
2.
Select the  button to confirm that the
form has been registered.
button to confirm that the
form has been registered.
Note: To reload a blank
form, select the button
Note: To modify
information entered during a previous step, select the button which will direct the user to
Step 3 and display the previously entered information.
The Transaction Complete stage is presented with the information of the transaction performed.
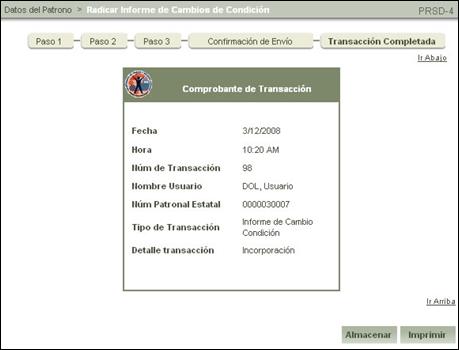
Figure 12: Transaction Complete Confirmation
Note: To print the
confirmation, select the  button.
Note: To save a digital
copy of the confirmation, select the Save  button.