Massive Registry
The Massive Registry is a system feature that allows for loading a predefined Excel file with the new hires or re-hires data within a specific period to the Portal. It is recommended that the amount of records entered not exceed 1,500.
The veracity of the information provided to the Department is the complete responsibility of the employer.
The registration process is also comprised of three (3) steps which actively change the text to Boldface as they progress identifying the current Step and the title of the action performed
|
DTRH User Only
|
If it is a user from the Department of Labor, a Represent Employer option will appear on screen before accessing the Massive Registry screen. Please refer to the Represent Employer section. |
To perform the registration the following 3 steps must be executed:
1. Step 1 – Allows you to load the Excel file with the new hire information
2. Step 2 – Pertains to the authentication of the information entered into the system
3. Step 3 – Pertains to the creation of a confirmation message of the processed transaction

Figure 1: Steps to Complete the Registration
Steps to follow:
1. Enter the credentials to access the Portal.
2. Select the New Hires Tab. The general services description will be displayed
3. Select the Massive Registry option to move towards the screen that will allow you to initiate the transaction.
The Employer Information section displays the basic information of the Employer such as the State Employer Account Number, Federal Employer Identification Number, Company Name and complete Postal Address.
A message in red font will indicate the instructions to the user.
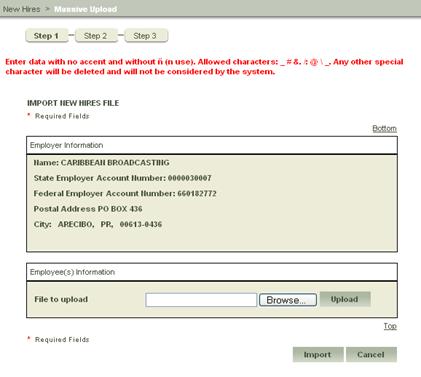
Figure 2: Massive Upload Screen
4.
Select the  button to choose the file
that contains the employees that must be registered. This action will open a
window that will allow the selection of the file to be used.
button to choose the file
that contains the employees that must be registered. This action will open a
window that will allow the selection of the file to be used.
Once the file has been selected,
choose the [Open] button to return to the Massive Registry screen with the file
ready to be imported. Once you can view the route of the file to be added select
the  button to load the selected
file.
button to load the selected
file.

Figure 3: Importing the File
You will see the following screen
once you have selected the button.

Figure 4: File Loaded
In the event the file loaded is
not the desired file, proceed to select the  button to reselect the file to be
used. You will then repeat the previous steps.
button to reselect the file to be
used. You will then repeat the previous steps.
5. After
having loaded the file containing the new hire information, you must select the
 button to verify the data that is
being entered to the system.
button to verify the data that is
being entered to the system.

Figure 5: Verify Information
6. Once
the information entered has been verified, confirm the Total Records Read, the
Valid Records and those that are invalid. Select the  button to feed the new hires into the
system. This action will display the confirmation for the processed transaction
data log.
button to feed the new hires into the
system. This action will display the confirmation for the processed transaction
data log.
In the event a message in red font appears within the registry, it indicates the data contains an error. The Cancel button must then be selected to identify which piece of information in the record is not in the correct format. The correction is then made and the file reloaded with the correct information. Progression to the next step is not possible while the registry continues to present errors.
7. Step 3, Transaction Complete message appears presenting the transaction confirmation and all relevant information.
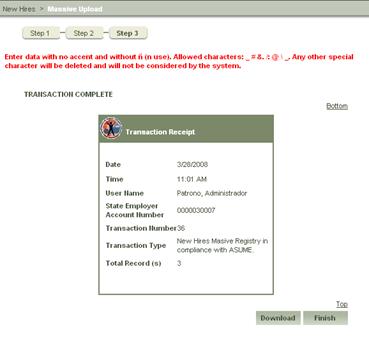
Figure 6: Transaction Complete
The confirmation compiles the following information:
• Date: in which the registration was performed;
• Time: in which the registration was performed;
• User: that performed the registration;
• State Employer Account Number: of the Employer;
• Transaction Number: automatically generated;
• Transaction Type: identifies the type of Registration performed (Individual or Massive); and
• Total Registration(s): number of registrations in the transaction.
8.
Select the  button to finalize the
operation and return to the New Hire main page.
button to finalize the
operation and return to the New Hire main page.
To obtain a digital confirmation
of the transaction select the  button
to activate this feature in PDF format on the screen.
button
to activate this feature in PDF format on the screen.